Imagine this: you create a fun, kitschy product brand on Shopify. Your customers love you, your product names sing, and your packaging is awesome.
And then you try to run Google Shopping. You can’t figure out why your impressions aren’t higher, or your clickthrough rate is “meh.”
There’s something that doesn’t get talked about a lot, but it’s a thing: how to make a brand search-friendly when it probably inherently isn’t.
Selling With a Brand Versus Selling With Search
Yes, the two can co-exist! But, it might mean building a bridge to make it happen. In reality, the best brands figure out how to do both without taking anything away from the other.
This can feel impossible for a brand that’s trying to do a lot with a little, whether that’s staff levels or spend levels.
Search ads conjures up the idea of text-based selling, and that’s hard to do with brands that are visual in nature. Even though Shopping features photos, it still relies on user-input text and advertiser-supplied product feeds. In this way, Google acts as the bridge for that, but for branding? Not so much.
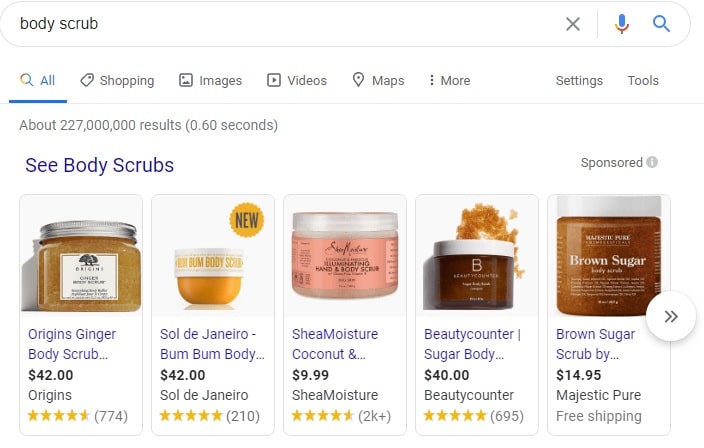
It reduces all that well-thought branding to this:
Google correctly finds body scrubs for me, but not much beyond that. I have product packaging, a truncated product title, and almost all of them have high ratings.
In this example, you scan see “scrub” and “sugar” in the name, so imagine how much harder this gets if you’re a brand that has a coy name.
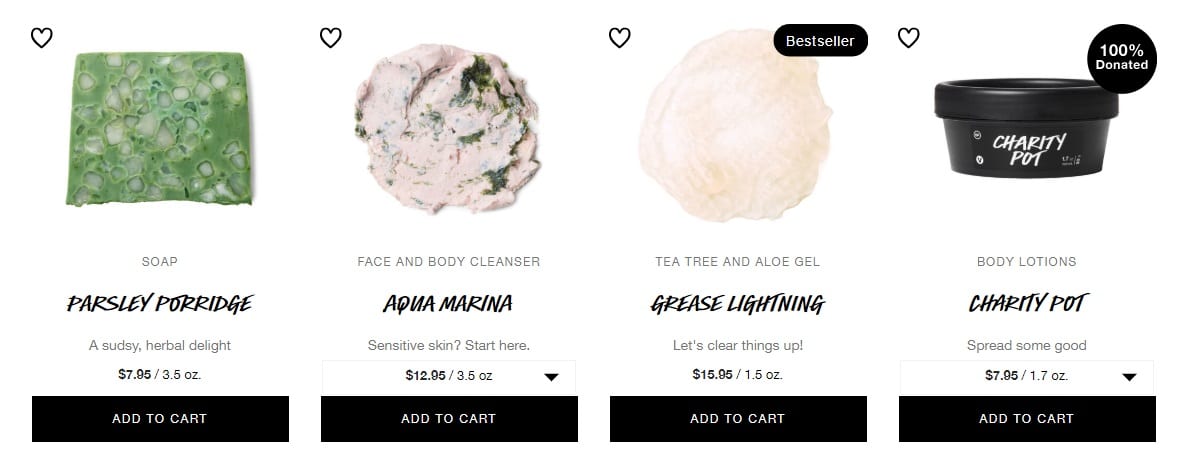
Let’s look at Lush cosmetics, for example:
Catchy names, and they have a very dedicated following, but how well would this translate to searchers? Unless they’re searching specifically for “parsley porridge,” it might struggle to show it’s a good match if someone searches for “vegetarian soaps.”
Automatic Feed Shortcomings
When a brand runs on Google Shopping, it relies on a product feed. Most online stores automatically export the information so it stays up-to-date. While spreadsheet uploads are an option, things like price changes and stock levels can get dicey, because those don’t update that information live. That means a new spreadsheet to fix those things and – ugh, no thank you.
The drawback with the automated solution is what’s outlined above: your basic feed export doesn’t have any fancy controls in place, it just pulls what’s running on the website.
In other words, the stuff that’s great for a branded feel, but maybe not search-friendly. This is especially prevalent when Shopify store owners use one of the free apps to pull the information into Merchant Center. They’re free, but that means no bells and whistles to address this.
Supplemental Feeds in Merchant Center
Merchant Center has a feature that probably isn’t great at explaining itself to advertisers that are unfamiliar with it.
(We could probably have a whole separate entry on how intimidating Merchant Center feels to business owners, while we’re at it, but…that’s another story.)
But, this one feature is so powerful! It helps act as an intermediary for this branding and search world, and once you know how to do it, it doesn’t take long at all. They’re called Supplemental Feeds.
The idea is great, because it empowers you to add or override things in your feed without having to mess with the export itself.
It basically lets you say “Use what’s in the Feed, except for this column – use this instead.”
“Those changes” can be any number of things, but here are some examples:
- Overriding product titles (which I will show you below)
- Adding Custom Labels
- Fixing disapproved or missing GTINs
- Changing prices quickly if you put up a sale faster than the feed will fetch
How To Use Supplemental Feeds & Google Sheets for Search-Friendly Titles
Using supplemental feeds and Google Sheets, you can easily create search-friendly titles that won’t change anything on your website. BOOM! Best of both worlds in branding and search.
Here’s how you do it.
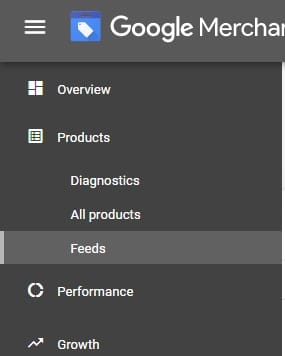
In Merchant Center, navigate to the Feeds section:
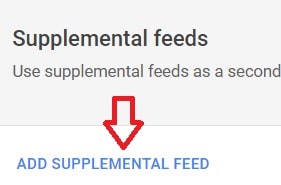
When you see the next screen, you’ll see a section at the bottom for Supplemental Feeds. (Ding, ding!) Click on the button to Add Supplemental Feed:
This is where it might start to feel a little intimidating, but it’s not. Don’t worry! On the next screen, leave the option for Google Sheets selected and then hit Continue.
What this will do is have you confirm login to Google Sheets, and create a Sheet that’s now automatically linked from your Shopping setup as a supplemental feed!
All you have to do is input what column it is you are specifying different information for. The column you must always have is the product ID – it’s the “parent” for all of your data.
So, start by inputting those or if you have a lot, you can copy and paste them from the main feed. (You can download it in Merchant Center and just open it in Excel to copy them.) If you’re running on Shopify, your product IDs are pretty unhelpful, so make this easier, I copied my ID column and my product title columns and pasted them into the Sheet.
This way, I knew which Product ID was which title and could just go down the list and update them.
In this example, I wind up with a very simple, two-column setup:
How To Override To Your Sheet in Merchant Center
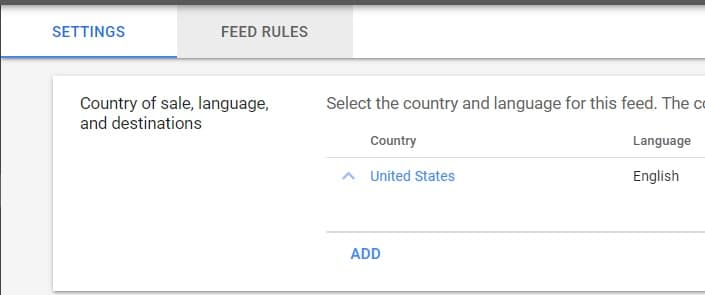
Go back to your main Feeds section and click on your Primary Feed. It will take you to the Settings page, but along the top there’s an area to navigate to “Feed Rules”:
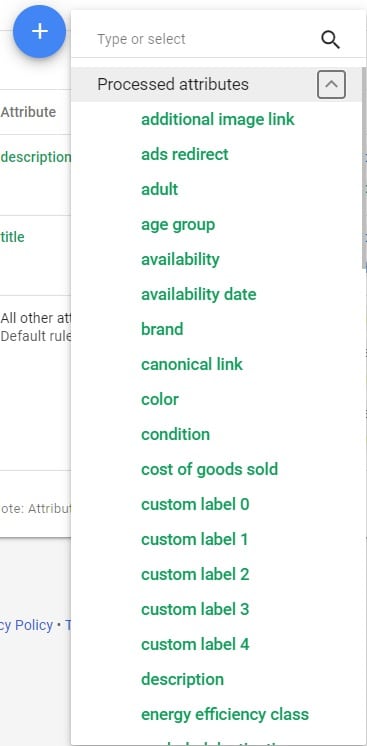
Then just click that big, blue plus sign, and choose “Processed Attributes.” It’ll give you a dropdown of all the fields in your default feed:
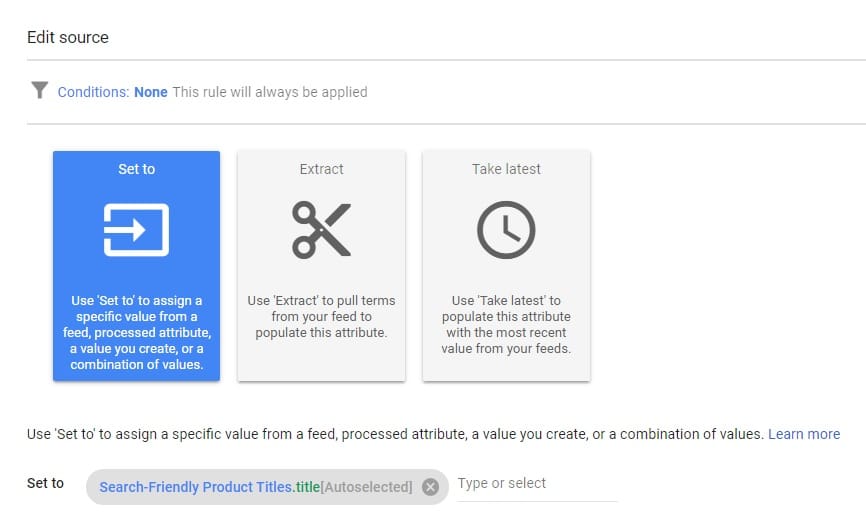
Choose “title” and on the next page, you can hit the option for “Set to.” In the field, you can start typing what your Google Sheet is named and MAGIC! It knows it exists, so you can select it, and save. It’ll look something like this:
You did it! Now those keyword-rich product titles will render to users, while changing NOTHING on your website or in your default feed.
Now that you have supplemental superpowers, take a look at that list of attributes and see how else you can fortify that feed for maximized Shopping!
Have questions or comments?Â
Please ask them below. And if AIMCLEAR can help grow your business, contact us for a free consultation!Â
